
Measure Your Space
Getting accurate measurements of your existing space is a relatively simple task, but an important step in making sure your designer has the information needed to create a design for your new kitchen. You will want to complete this task before you have your first meeting with your designer.
First, watch this How To Measure Your Kitchen video, then follow the simple steps below to measure your space and send the information to a KraftMaid Advisor.
Print out and use this graph paper which will help in creating a sketch of your space.
Tools you will need • Pencil • Steel measuring tape • Graph paper • Camera/Cell Phone
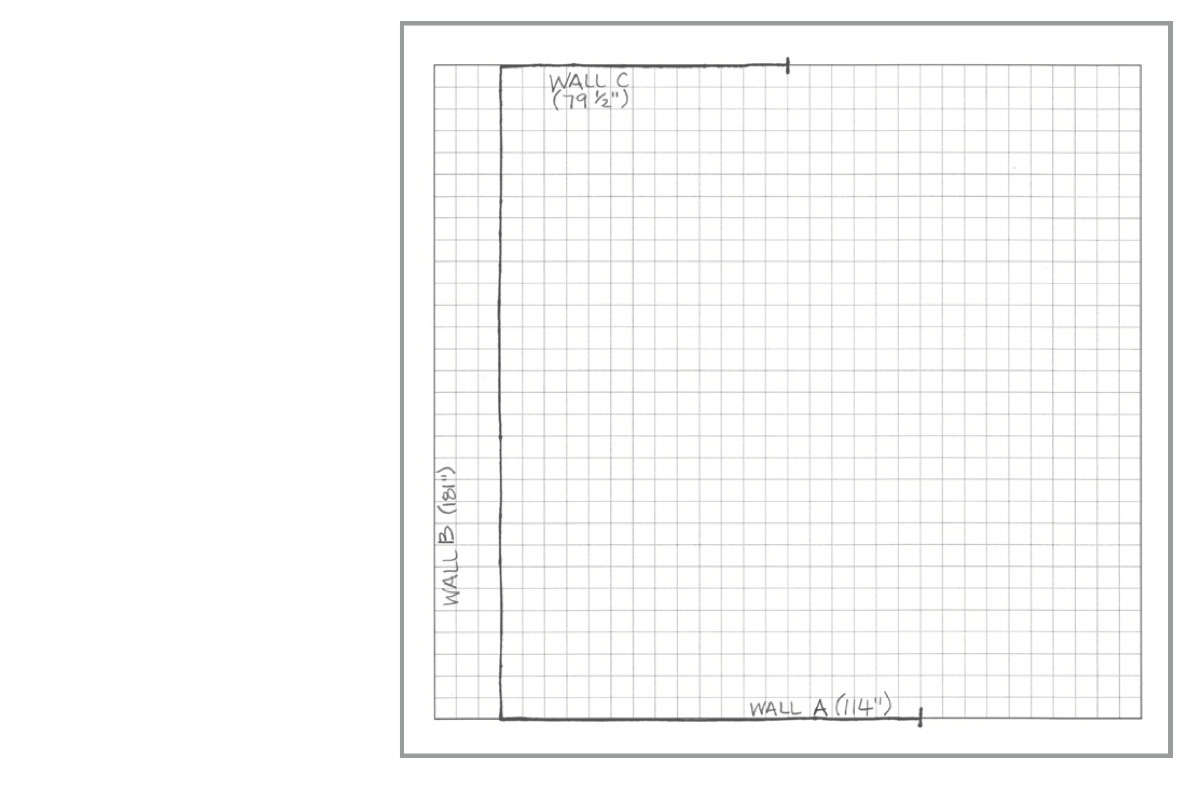
Step 1: Sketch and outline of your floor plan.
- Use the grid to make it easy to draw straight lines. Label each wall of your space with a letter in your drawing. Measure and write down the full width of each wall from corner to corner.
- Take a straight-on picture of each wall in your drawing. This will help your designer get a better understanding of your space.
- Start by standing in the center of your room
- Take a picture of the wall you will draw at the “top” of your sketch
- Then rotate 90 degress clockwise, to the wall which will be the “right” side of your sketch. (it’s ok if you have to step back to capture the entire wall)
- Continue until you have photographed all four walls
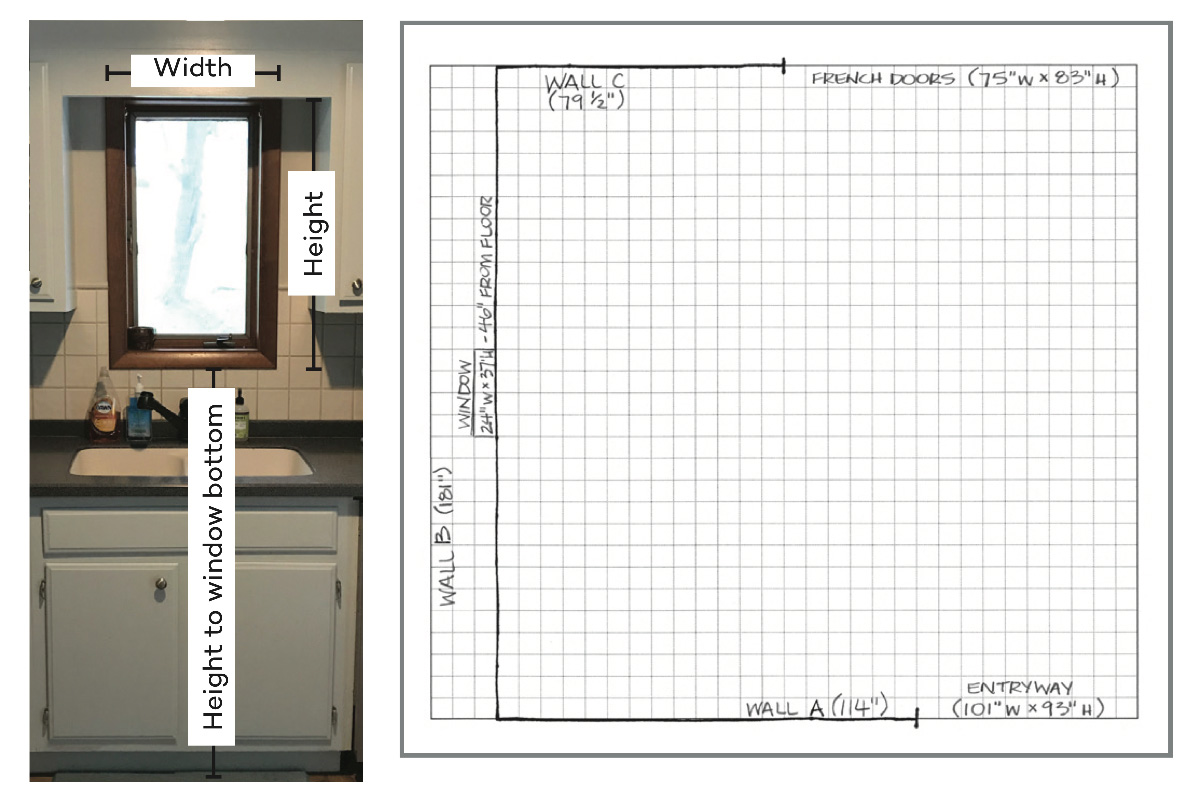
STEP 2: Add windows, doorways and other obstructions.
- Measure the width of each door and window, including the frame/molding in your measurement.
- Note the height of each door and window (again, including the frame/molding). For windows, also note the distance from the floor up to the bottom of the window.
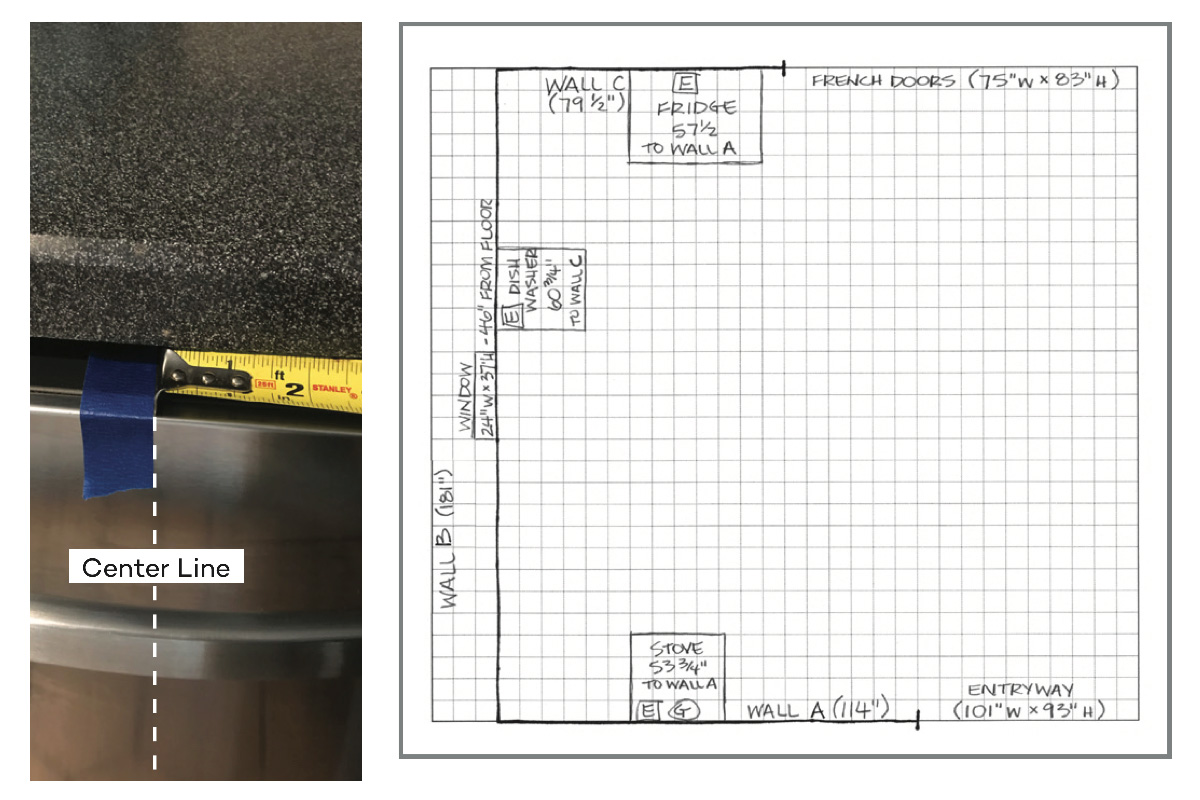
STEP 3: Mark appliance connections.
- Measure from the center of each appliance to the nearest wall. It might be helpful to mark the center with a piece of painters tape and then measure from that point to the wall.
- If you’re planning to keep any of your current appliances, measure their height, width and depth.
- If you’re planning to purchase new appliances, provide the manufacturer and model information to your designer to ensure that your new cabinet layout will accommodate them.
STEP 4: Mark plumbing drain and supply lines.
- Measure plumbing locations to the nearest wall.
Mark plumbing locations with a “P”. - Indicate whether the sink drain goes into the floor or the wall.
- If you have a gas range, note the location of the gas supply line, or measure from the centerline of the range if the supply line is not visible. Marke gas line locations with a “G”.

STEP 5: Mark electrical outlets and switches.
- Measure the location of electrical outlets and switches from the centerline of the outlet or switch to the nearest wall.
- Mark electrical outlets and switches with an “E”.

STEP 6: Note the ceiling height and soffit dimensions (if applicable).
- Measure the ceiling height in 2-4 locations throughout the room.
- A soffit is the area where a ceiling extends down to meet the top of your cabinets. If you have soffits, measure their height and width.
(The kitchen shown in the photo does not have a soffit.)

STEP 7: Double check!
- To double check your measurements, make sure that the measurements of the individual elements in your drawing add up to the total dimension of each wall.
One additional consideration: If you’re not planning to replace your flooring, measure the footprint of your existing lower cabinets so that your designer can ensure that the same areas will be covered with your new cabinetry.
THAT’S IT! Now you’re ready to begin the exciting part! Using the form below, send your sketch with measurements and photos to your designer so they can fully understand your current space, to transform it into something you’re going to love.